
Lesson 5 of 11
Your First Hive Inspection
What to check, in what order, how to read a frame, and how to work a hive calmly so your bees — and you — stay relaxed.
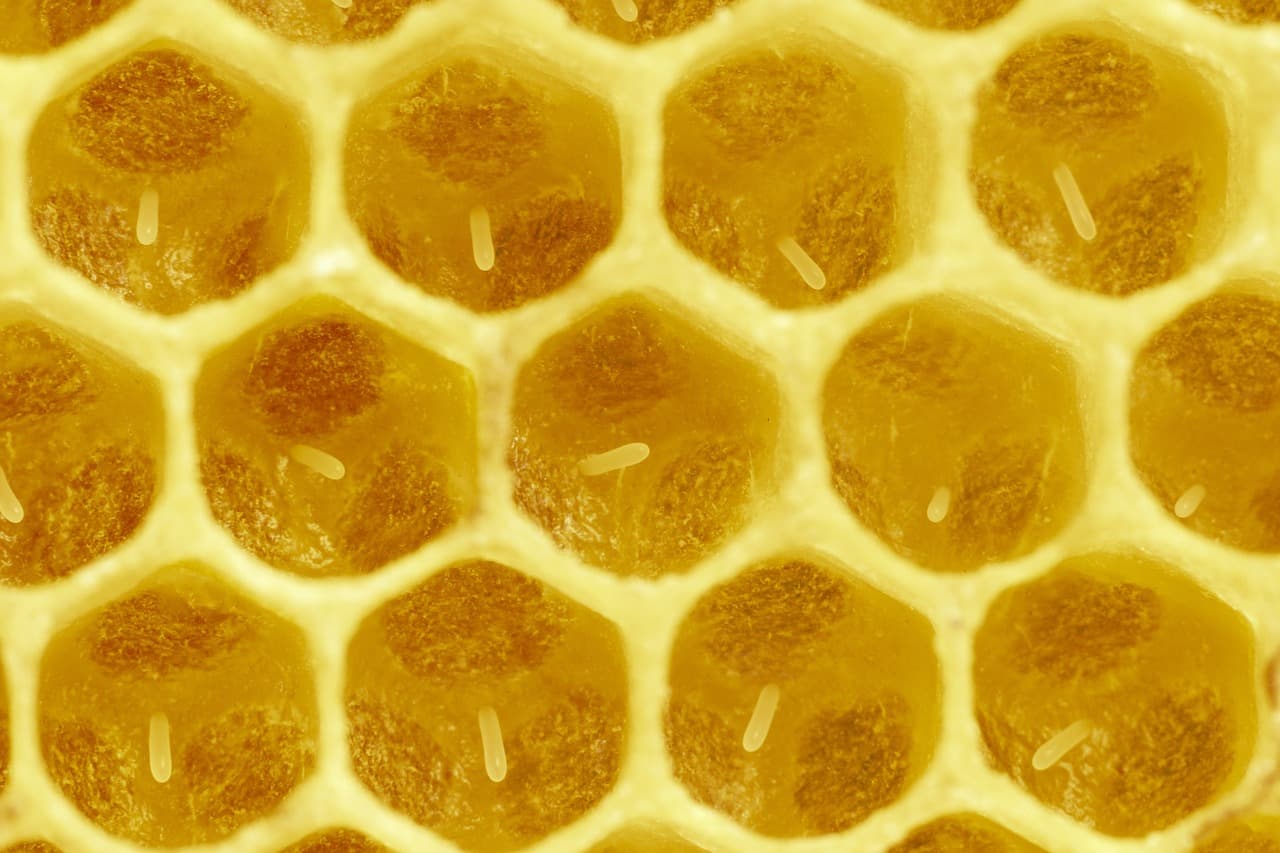
Your first few inspections will feel slow and uncertain — that's normal. This lesson walks through what an inspection is actually for, what to check and in what order, and how to handle the hive calmly so the process gets easier for both you and the bees.
What an inspection is for
An inspection isn't just "opening the hive to look" — it's answering a short list of specific questions: Is there a laying queen? Does the colony have enough food? Is there enough room to grow? Are there signs of pests, disease, or swarming? Going in with those questions in mind keeps inspections efficient and keeps the hive open for less time, which matters — every minute a hive is open is a minute of heat loss, disrupted work, and defensive stress for the colony.
How often to inspect
During the active spring-through-fall season, roughly every 7-10 days is a reasonable rhythm for a new colony: frequent enough to catch a failing queen, swarm preparations, or a pest problem while it's still easy to address, but not so frequent that you're constantly disrupting brood-rearing and foraging. In winter, when the colony is clustered, inspections drop to occasional quick checks (weight, entrance activity) rather than opening the hive itself in cold weather.
Working calmly
- Light the smoker before you start, and have it going reliably — a few gentle puffs at the entrance, then a few more once the lid is off, is usually enough. Smoke masks the alarm pheromone bees release when disturbed and triggers a feeding response that makes them calmer.
- Move slowly and deliberately. Fast or jerky movements read as threatening; bees respond far better to smooth, predictable motion.
- Work from the outside in. Start by removing an outer frame (usually food stores, with fewer bees on it) to create working space, then move inward toward the brood nest.
- Minimize crushing. Most defensive stings happen because a bee got squeezed between frames or under a hive tool — careful, attentive handling avoids most of it.
- Keep visits short. Once you've answered your key questions, close up. There's rarely a reason to linger.
What to check, in order
- Overall temperament and activity at the entrance — before you even open the lid, note whether the colony seems calm or agitated, and how much traffic there is.
- Space and stores — is there room to expand, or are frames packed solid? Is there visible capped honey and pollen nearby the brood nest?
- The brood nest — this is the core of the inspection. Look for:
- Eggs (tiny, rice-grain-sized, standing upright in the base of a cell) — evidence a queen was laying within the last three days.
- Larvae — small white grubs curled in cells, in various sizes as they grow.
- Capped brood — a slightly domed, tan-to-brown wax capping over pupating bees, ideally in a fairly solid, contiguous pattern rather than scattered gaps.
- Signs of pests or disease — deformed wings, unusual odors, discolored or sunken brood cappings, visible mites on adult bees, or an unusually high number of dead bees at the entrance are all reasons to look more closely or seek a second opinion (covered in more depth in the pests and disease lesson).
- Queen cells, if present — peanut-shaped cells hanging off the face or bottom edge of a frame can indicate swarm preparation or an emergency queen replacement in progress (covered in the swarm-prevention lesson).
Reading a frame
A "good" frame at the height of the season typically shows a fairly solid, roughly oval block of capped brood surrounded by a ring of pollen, then a ring of capped or curing honey at the corners — a layout that reflects how the queen lays outward from the frame's center and how foragers store food around the edges of the nest. Learning to recognize this pattern by sight, rather than needing to count individual cells, comes with repetition — by your third or fourth inspection, it usually starts to click.
Sources & Further Reading
This lesson paraphrases general inspection technique and brood-reading guidance from the FAO and Wikibooks.
- FAO. Good Beekeeping Practices for Sustainable Apiculture. 2021. Licensed under CC BY 3.0 IGO. https://www.fao.org/documents/card/en/c/cb4923en
- Wikibooks contributors. Beekeeping. Licensed under CC BY-SA 4.0. https://en.wikibooks.org/wiki/Beekeeping
What combination on a frame most reassures you that a queen is present and laying recently?
Roughly how often should a new colony be inspected during the active growing season?
What does a 'spotty' brood pattern — capped cells scattered unevenly among empty ones — typically suggest?